Author Archives: admin

Creating a Dummy Build Project In VS2008

0
Filed under MSBuild

In the process of automating my build process for a project in 2008 (and VB6), I needed to have several additional steps happen during the build.

If the steps were directly related to a specific project within the overall solution, I could just alter the VBPROJ or CSPROJ file directly to include the required targets, no big deal. But in this case, I needed these steps to happen AFTER the overall build (at least, the build of the normal .NET solution).

I’m also using TFS and its build system to (eventually) automate the entire build process from a standalone server. But I’d like for the build process to be executable from any old workstation (assuming the required prerequisite files and apps are installed) for debugging and troubleshooting purposes. Anybody that would say that automating the build process isn’t an entire development project in it’s own right is out of their mind!

Furthermore, I wanted to impact the overall project build process as little as possible, so I really didn’t want to go traipsing around in the TFSBuild.proj file, or altering any of the TFS config at all if possible.

I knew that VBPROJ and CSPROJ files are nothing more than MSBUILD xml config files, which can be easily extended. But I wanted/needed something that would execute AFTER all the projects in my solution were built (and possibly before, but the same principle applies).

Then it struck me. What about a dummy project? One that could participate in the build process just as every other project in the solution, but which didn’t ACTUALLY build any specific .net assembly at all.

First step, add a new project. I picked an “empty VB project” for this.

image

But when I did this, I got an error

image

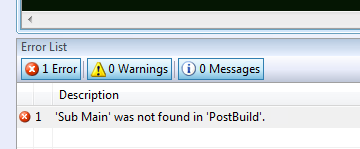
Rats, VS was insisting that the project have a sub Main, and I don’t really want anything compiling in this project. But a little poking around in the VBPROJ file turned up this IMPORTS line

   <Import Project="$(MSBuildBinPath)\Microsoft.VisualBasic.targets" />

Remove it, and the Sub Main error goes away. Those VisualBasic.targets are what controls that validation.

If you try and build the project at this point, though, you’ll get an error that no “Build” target exists in the file. That’s because the default Build target is defined by that VisualBasic.Targets line, and we just removed it.

So, I added my own Build target near the end of the file, with some testing tasks in it just to see what happens.

  <Target Name="Build">
      <Message Text="The Test build was called" />
      <Exec Command="Pause" />
  </Target>
  <!-- To modify your build process, add your task inside one of the targets below and uncomment it. 
       Other similar extension points exist, see Microsoft.Common.targets.
  <Target Name="BeforeBuild">
  </Target>
  <Target Name="AfterBuild">
  </Target>

Interestingly, the Message text does NOT display in the VS output window, but the EXEC task does (and the build is NOT paused by the PAUSE command).

image

Also, I’ve left them in for reference above, but when you remove the import of the Microsoft.VisualBasic.Targets file, the BeforeBuild and AfterBuild targets are effectively moot. They won’t do anything anymore, so you can remove them.

Editing the Project in the IDE

One problem that you’ll run into immediately with all this is that the Visual Studio IDE wants to handle those VBPROJ files special. And if you have the VBPROJ file opened in the IDE, the ONLY way you can change it is via the VS GUI. But the VS GUI doesn’t give you access to all the nooks and crannies of a VBPROJ file that you need to mess with for this to work.

One way to get around this problem is to unload the project (Right click on the Project in the Solution Explorer and select unload. Then Right click on the project again and you should see a “Edit your project name” menu item. Select it and your project should load up in VS just like any other XML file.

Then, when you’re ready to test again, right click the project and select reload.

The downside is that’s an awful lot of unloading and reloading. Quite simply, it’s a pain.

Luckily, there’s another way.

What if I put all my “real” targets in a plain ol’ PROJ file, and added it to this dummy project. After a few tests, it was clear that if you do this, you can easily open this “sub-PROJ” project file directly from within the VS IDE, no unloads or reloads necessary. But, I’d need a way to start up my sub project from within the actual dummy VBPROJ file.

Turns out, MSBuild has several actions that essentially let you “fire off” other targets as if they were “subroutines”.

The first I checked out was CallTarget. Unfortunately, it can only call targets within the current project file, and what I really wanted was to fire a target in a different project file.

Then I read up on the MSBuild task. It does allow you to specify both a Project to build (which could be a SLN solution file, but that’s another topic), and a Target within that project. AHA! The answer.

So I setup a simple test. First, my altered dummy VBPROJ file

<?xml version="1.0" encoding="utf-8"?>
<!-- This is a dummy build project for Post Build steps -->
<Project DefaultTargets="Build" ToolsVersion="3.5" xmlns="http://schemas.microsoft.com/developer/msbuild/2003">
  <PropertyGroup>
    <Configuration Condition=" '$(Configuration)' == '' ">Debug</Configuration>
    <Platform Condition=" '$(Platform)' == '' ">AnyCPU</Platform>
    <ProductVersion>9.0.30729</ProductVersion>
    <SchemaVersion>2.0</SchemaVersion>
    <ProjectGuid>{4D124D21-B683-40F2-89C3-658AA1B51DE9}</ProjectGuid>
    <FileAlignment>512</FileAlignment>
    <MyType>Empty</MyType>
    <TargetFrameworkVersion>v3.5</TargetFrameworkVersion>
  </PropertyGroup>
  <PropertyGroup Condition=" '$(Configuration)|$(Platform)' == 'Debug|AnyCPU' ">
  </PropertyGroup>
  <PropertyGroup Condition=" '$(Configuration)|$(Platform)' == 'Release|AnyCPU' ">
  </PropertyGroup>
  <ItemGroup>
  </ItemGroup>
  <ItemGroup>
    <ProjectsToBuild Include="PostBuild.proj" />
  </ItemGroup>
  <ItemGroup>
    <Folder Include="My Project\" />
  </ItemGroup>
  <Target Name="Build">
    <MSBuild Projects="@(ProjectsToBuild)"/>
  </Target>
</Project>

The key element is the ProjectsToBuild item and the MSBuild task of the Build target.

That ProjectsToBuild item should cause the PostBuild.proj file to show up in the VS Solution explorer as just another file you can open like normal and easily edit.

Then, in the PostBuild.proj file,

<?xml version="1.0" encoding="utf-8" ?>
<Project ToolsVersion="3.5" DefaultTargets="Build" xmlns="http://schemas.microsoft.com/developer/msbuild/2003" >
   <!-- Must Set MSBuildEmitSolution envvar to 1 to cause msbuild to convert a SLN to a proj file -->
   <!-- Define various properties to use during the build here -->
   <PropertyGroup>
   </PropertyGroup>

   <Target Name="Build">
      <Exec Command="Echo Did the build" />
   </Target> 
</Project>

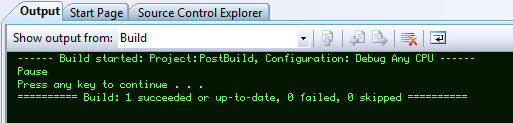
Now, if you build the project from VS and look at the Output window, you show see the “Echo Did the build” item.

Success!

Problems in Paradise

Unfortunately, all is not roses with this approach. As a test, I changed “Did the build” to “Did the build2” in my PostBuild.proj file, then rebuilt the project.

The output didn’t change. At all. Apparently, VS caches the projects in some fashion and only rereads them in peculiar circumstances. I say peculiar because even UNLOADING the project and RELOADING it did not force the PostBuild.proj changes to be read in. Only unloading all of Visual Studio and reloading it worked. This is specifically not what Microsoft alludes to as being correct behavior here, excerpted:

Editing Loaded Project Files

Visual Studio caches the content of project files and files imported by project files. If you edit a loaded project file, Visual Studio will automatically prompt you to reload the project so that the changes take effect. However if you edit a file imported by a loaded project, there will be no reload prompt and you must unload and reload the project manually to make the changes take effect.

But, no matter what I tried, the only thing that seemed to force a reload of cached project files was reloading VS.

Then I happened to notice two other build tasks, Vbc and VCBuild. They wrap the VB and VC compile processes, essentially doing the same thing. But looking at their parameters, they are VERY different beasts. the biggest difference is that Vbc appears to take a list of Source files as an argument, whereas VCBuild is almost identical to MSBuild. It takes Projects and Targets parameters. Hmm, could it be?

I replaced “MSBuild” with “VCBuild” and tried again. Surprisingly, even though my PostBuild.proj file has nothing to do with Visual C, VCBuild happily compiled away, rereading the PostBuild.proj file as I’d wanted. Change the PostBuild.proj file from the IDE, save and Build, and the changes are picked up immediately and compiled just as I was looking for.

The altered dummy VBProj file.

<?xml version="1.0" encoding="utf-8"?>
<!-- This is a dummy build project for Post Build steps -->
<Project DefaultTargets="Build" ToolsVersion="3.5" xmlns="http://schemas.microsoft.com/developer/msbuild/2003">
  <PropertyGroup>
    <Configuration Condition=" '$(Configuration)' == '' ">Debug</Configuration>
    <Platform Condition=" '$(Platform)' == '' ">AnyCPU</Platform>
    <ProductVersion>9.0.30729</ProductVersion>
    <SchemaVersion>2.0</SchemaVersion>
    <ProjectGuid>{4D124D21-B683-40F2-89C3-658AA1B51DE9}</ProjectGuid>
    <FileAlignment>512</FileAlignment>
    <MyType>Empty</MyType>
    <TargetFrameworkVersion>v3.5</TargetFrameworkVersion>
  </PropertyGroup>
  <PropertyGroup Condition=" '$(Configuration)|$(Platform)' == 'Debug|AnyCPU' ">
  </PropertyGroup>
  <PropertyGroup Condition=" '$(Configuration)|$(Platform)' == 'Release|AnyCPU' ">
  </PropertyGroup>
  <ItemGroup>
  </ItemGroup>
  <ItemGroup>
    <ProjectsToBuild Include="PostBuild.proj" />
  </ItemGroup>
  <ItemGroup>
    <Folder Include="My Project\" />
  </ItemGroup>
  <Target Name="Build">
    <VCBuild Projects="@(ProjectsToBuild)"/>
  </Target>
</Project>

But, there’s a problem here too. If you’ve configured the output verbosity level for MSBuild to be something other than the default, VCBuild doesn’t appear to honor the change, and ends up using a fairly minimal output level. That can make debugging far more painful than it should be. None-the-less, it does work.

One more shot

Given that the verbosity level doesn’t follow through, I decided to make one last attempt. Instead of invoking the MSBuild task, why not invoke the MSBuild.EXE itself via an Exec task? Since VS has already invoked MSBuild to perform the outer project build, you can use the MSBuildBinPath property to know where to invoke MSBuild from, so the dummy VBProj file ends up looking like this.

<?xml version="1.0" encoding="utf-8"?>
<!-- This is a dummy build project for Post Build steps -->
<Project DefaultTargets="Build" ToolsVersion="3.5" xmlns="http://schemas.microsoft.com/developer/msbuild/2003">
  <PropertyGroup>
    <Configuration Condition=" '$(Configuration)' == '' ">Debug</Configuration>
    <Platform Condition=" '$(Platform)' == '' ">AnyCPU</Platform>
    <ProductVersion>9.0.30729</ProductVersion>
    <SchemaVersion>2.0</SchemaVersion>
    <ProjectGuid>{4D124D21-B683-40F2-89C3-658AA1B51DE9}</ProjectGuid>
    <FileAlignment>512</FileAlignment>
    <MyType>Empty</MyType>
    <TargetFrameworkVersion>v3.5</TargetFrameworkVersion>
  </PropertyGroup>
  <PropertyGroup Condition=" '$(Configuration)|$(Platform)' == 'Debug|AnyCPU' ">
  </PropertyGroup>
  <PropertyGroup Condition=" '$(Configuration)|$(Platform)' == 'Release|AnyCPU' ">
  </PropertyGroup>
  <ItemGroup>
  </ItemGroup>
  <ItemGroup>
    <ProjectsToBuild Include="PostBuild.proj" />
  </ItemGroup>
  <ItemGroup>
    <Folder Include="My Project\" />
  </ItemGroup>
  <Target Name="Build">
    <Exec Command='$(MSBuildBinPath)\MSBuild.exe /v:diag "@(ProjectsToBuild)"'/>
  </Target>
</Project>

I’ve added the /v:diag switch to force diagnostic level verbosity, but that is easily changeable.

Lo and behold, I get the full output from BOTH MSBuild invocations in the Visual Studio Output window.

But What About Rebuild

At this point, performing a Build from VS will work exactly as expected, but if you try a Rebuild, you’ll get an error about your project file missing a Rebuild target.

In this case, a rebuild is the same as a build, so I’ll just make them dependent tasks.

<Target Name="Build">
    <Exec Command='$(MSBuildBinPath)\MSBuild.exe /v:diag "@(ProjectsToBuild)"'/>
</Target>

<Target Name="Rebuild" DependsOnTargets="Build" />

Notice the new Rebuild target above, and that it “Depends On” the Build target. That’s the only change necessary.

Conclusion

At this point, I have a project that I can add to any solution, which itself contains an MSBuild proj file which automatically builds when its host project needs to be built. And this would apply to builds within the IDE as well as builds from TFSBuild or any other automated build system.

Using some conditions and properties, it would be fairly easy to control when the project compiled (for instance, ONLY during a TFSBuild build, or only in the IDE when in RELEASE configuration.

And best of all, it’s all still completely editable from within the Visual Studio IDE!

Controlling MSBuild with Environment Variables

168
Filed under MSBuild

It’s relatively trivial to control MSBuild from within Visual Studio by simply selecting different configurations (typically there are two, DEBUG and RELEASE, though you can create as many as you need).

However, for large projects, switching configurations is not a speedy process, and maintaining multiple configurations can be a chore.

I’ve been working toward automating the build process at my company and one element that I really wanted to implement was selective control of the build process.

For instance, in some cases, I might want to build locally, from within VS, and only build the app itself, but in other cases, I might want to build the Windows portion of the app AND the web portion, and in still other cases, I might want to build the entire app AND compile the InstallShield files to build an MSI installer file.

Obviously, there would come a point where the combinations would get unwieldy using configurations.

I was looking for a solution when I realized that MSBuild maps ALL environment variables by default as “properties” that are easily queried and used in conditions within the build script.

Then, I just needed a way to easily set those environment variables.

I’ve long known that the SET batch command only sets environment variables for that particular DOS session, so that wouldn’t work for this purpose. But in researching this, I discovered the SETX command, exactly like SET, only it sets global environment variables instead of those in the current session. This means that if you invoke, say:

SETX MyVar “This is a test”

The variable MyVar will not be created in the current DOS session, but, close it, and open an new DOS session, and it will be set there!

The Concept

So, to automate the selection, all I should have to do is:

  1. Define the environment vars and their uses
  2. Create batch files that set those variables
  3. Create one more batch file to clear all the variables
  4. Add the batch files to my VS project somewhere

Then, when I want to set the variables one way or another, just run the batch file from within VS, then start a build.

The Batch Files

All that’s required in the batch files is a simple SETX for each variable you need to set.

REM Enabled Building Install
SETX BuildInstall "true"

You might also want to include a bat file that clears all the variables (to “reset” things, if you will), but otherwise, this is all that’s necessary.

To make these BAT files easy to use I created a “Folder” in my solution, dropped the BAT files into that folder and then defined an “Open With” action to open the bat files with CMD.EXE.

Unfortunately, it wasn’t quite that simple. If you right click on a BAT file that you’ve added to the solution, you should see an “Open With” option on the menu. Click it and you’ll get the “Open With” dialog.

Click Add on that dialog and you’ll get something that looks like this

image

The problem is, you can’t specify command line parameters in with the program name. It’s just the name.

To get around that, I created a “RUNBAT.BAT” file, and put it somewhere on my PATH. It’s contents are simple:

REM Just run a passed in bat file 
cmd.exe /c "%1"

Essentially, it’s just a wrapper around CMD.EXE that invokes whatever BAT file name is passed in on the command line.

But now, you can point that “Program Name” field in the “Add Program” dialog to your RUNBAT.BAT file, and presto! You can open that BAT file with just a right click, “Open With”

Even better, select your RUNBAT program entry and click the “Set as Default” button, and now, when you double click the BAT file from within Solution Explorer, the BAT file will automatically be run.

One Final Trick

Unfortunately, that won’t quite be enough to make things work. The thing is, Visual Studio is smart, sometimes too smart for it’s own good. In this case, it’s all about caching. VS caches all the environment vars at the time that it loads, and when you invoke a build, it supplies those cached env vars, and not the currently active set. That would mean you’d have to exit and reload VS each time you wanted to change any env vars to control the build. Definitely not a workable solution!

But there is a way around this.

The Microsoft MSBuild Extensions Pack contains an “EnvironmentVariable” task that explicitly retrieves or sets environment vars from the active env var buffer, and NOT from VS’s cache.

Use it from your MSBuild script like this:

<Target Name="PerformBuild">
     <MSBuild.ExtensionPack.Computer.EnvironmentVariable TaskAction="Get" Variable="ForceBuild" Target="User">
         <Output PropertyName="ForceBuild" TaskParameter="Value"/>
     </MSBuild.ExtensionPack.Computer.EnvironmentVariable>
....

You use the Get action, name the variable, and be sure to use the “User” target (this retrieves User level environment variables, which is where the SETX command will save them). Then, it stores the variable’s value in the property named by the “PropertyName” argument.

You now have the value of that variable in a property that you can easily use in conditions on tasks, or other properties, or whatever. In this example, I check if the “ForceBuild” property that was just retrieved above, is blank, if it is, then the ForceBuild property value is set to “false”.

<PropertyGroup>
<ForceBuild Condition="'$(ForceBuild)' == ''">false</ForceBuild>

Accessing the environment variables in this fashion, your build script will see the values of those variables as they’ve been set by your BAT files, even if those BAT files were executed from within Visual Studio.

It’s pretty simple, clean, and easily maintained from within Visual Studio. All qualities I really like!

If you know of a simpler way, I’d love to hear about it!

MSBuild Properties Don’t Always Evaluate Properly

0
Filed under MSBuild, Troubleshooting

image In my travails with MSBuild lately (the latest 3.5 version), I recently ran into some rather puzzling behavior. Essentially, it boils down to this.

If you set a property value via a PropertyGroup element within a target, and then use CallTarget to call another target, the property values you set won’t be visible to conditions on that called target.

If, on the other hand, you set those same property values from a PropertyGroup within a different target that your main target refers to via the DependsOnTargets attribute, then those properties will be visible to conditions on the called target.

Yeah, you read that right <g>

Here’s a test MSProj project file that illustrates the problem.

<?xml version="1.0" encoding="utf-8" ?>
<Project ToolsVersion="3.5" DefaultTargets="Build" xmlns="http://schemas.microsoft.com/developer/msbuild/2003" >
    <!-- Define various properties to use during the build here -->
    <PropertyGroup>
      <TestValue>false</TestValue>
    </PropertyGroup>

    
    <!-- A DependsOnTargets target -->
    <Target Name="DetermineTestValue">
        <PropertyGroup>
            <TestValue>true</TestValue>
        </PropertyGroup>
        <Message Text="TestValue=$(TestValue)" />
    </Target>

    
    <!-- The test condition fails here and this target is skipped -->
    <Target Name="DoTheBuildSkips" 
            Condition="'$(TestValue)' == 'true'">
      <Message Text="Did the Build (skipped)" />
    </Target>

    
    <!-- The test condition DOES NOT fail here and this target is executed -->
    <Target Name="DoTheBuildWorks" 
            Condition="'$(TestValue)' == 'true'">
      <Message Text="Did the Build (works)" />
    </Target>


    <!-- Root Target just Executes two different test targets -->
    <Target Name="Build" DependsOnTargets="PropertyIsNotSeenProperly;PropertyWorks" />
    
    <!-- First test target, set the TestValue to true and use calltarget, this fails -->
    <Target Name="PropertyIsNotSeenProperly">
        <PropertyGroup>
            <TestValue>true</TestValue>
        </PropertyGroup>
        <!-- the TestValue is true at this point but false when evaluated from DoTheBuildSkips -->
        <Message Text="TestValue (place1)=$(TestValue)" />
        <CallTarget Targets="DoTheBuildSkips" />
    </Target>    

    <!-- Second test target, set the TestValue to true from the DependsOnTarget
         and the "DoTheBuildWorks" target is executed because the condition is true -->
    <Target Name="PropertyWorks" DependsOnTargets="DetermineTestValue">
        <!-- the TestValue is set to true from within DetermineTestValue and is ALSO true
             when evaluated from DoTheBuildWorks -->
        <CallTarget Targets="DoTheBuildWorks" />
    </Target>    

</Project>

Just drop it into a folder and run MSBuild. Be sure to use the /v:diag command line switch so you see the full output.

I piped the results to a file and (with some bits trimmed out) this is the result:

Microsoft (R) Build Engine Version 3.5.30729.1
[Microsoft .NET Framework, Version 2.0.50727.3074]
Copyright (C) Microsoft Corporation 2007. All rights reserved.

Build started 7/23/2009 4:25:13 PM.
Project "O:\Dev\Darin\Articles\MSBuild Property Failure\Test.proj" on node 0 (default targets).
Initial Properties:
ALLUSERSPROFILE = C:\ProgramData
...Many env vars cut out here
TestValue = false

Building with tools version "3.5".
Target "PropertyIsNotSeenProperly: (TargetId:4)" in file "O:\Dev\Darin\Articles\MSBuild Property Failure\Test.proj" from project "O:\Dev\Darin\Articles\MSBuild Property Failure\Test.proj":
Using "Message" task from assembly "Microsoft.Build.Tasks.v3.5, Version=3.5.0.0, Culture=neutral, PublicKeyToken=b03f5f7f11d50a3a".
Task "Message" (TaskId:0)
  TestValue (place1)=true (TaskId:0)
Done executing task "Message". (TaskId:0)
Using "CallTarget" task from assembly "Microsoft.Build.Tasks.v3.5, Version=3.5.0.0, Culture=neutral, PublicKeyToken=b03f5f7f11d50a3a".
Task "CallTarget" (TaskId:1)
Target "DoTheBuildSkips" skipped, due to false condition; ('$(TestValue)' == 'true') was evaluated as ('false' == 'true').
Done executing task "CallTarget". (TaskId:1)
Done building target "PropertyIsNotSeenProperly" in project "Test.proj".: (TargetId:4)
Target "DetermineTestValue: (TargetId:0)" in file "O:\Dev\Darin\Articles\MSBuild Property Failure\Test.proj" from project "O:\Dev\Darin\Articles\MSBuild Property Failure\Test.proj":
Task "Message" (TaskId:2)
  TestValue=true (TaskId:2)
Done executing task "Message". (TaskId:2)
Done building target "DetermineTestValue" in project "Test.proj".: (TargetId:0)
Target "PropertyWorks: (TargetId:5)" in file "O:\Dev\Darin\Articles\MSBuild Property Failure\Test.proj" from project "O:\Dev\Darin\Articles\MSBuild Property Failure\Test.proj":
Task "CallTarget" (TaskId:3)
Target "DoTheBuildWorks: (TargetId:2)" in file "O:\Dev\Darin\Articles\MSBuild Property Failure\Test.proj" from project "O:\Dev\Darin\Articles\MSBuild Property Failure\Test.proj":
Task "Message" (TaskId:4)
  Did the Build (works) (TaskId:4)
Done executing task "Message". (TaskId:4)
Done building target "DoTheBuildWorks" in project "Test.proj".: (TargetId:2)
Done executing task "CallTarget". (TaskId:3)
Done building target "PropertyWorks" in project "Test.proj".: (TargetId:5)
Done Building Project "O:\Dev\Darin\Articles\MSBuild Property Failure\Test.proj" (default targets).

Project Performance Summary:
      107 ms  O:\Dev\Darin\Articles\MSBuild Property Failure\Test.proj   1 calls

Target Performance Summary:
        0 ms  Build                                      1 calls
        5 ms  DoTheBuildWorks                            1 calls
        5 ms  DetermineTestValue                         1 calls
       11 ms  PropertyWorks                              1 calls
       21 ms  PropertyIsNotSeenProperly                  1 calls

Task Performance Summary:
       12 ms  Message                                    3 calls
       13 ms  CallTarget                                 2 calls

Build succeeded.
    0 Warning(s)
    0 Error(s)

Time Elapsed 00:00:00.11

(I’ve highlighted the key lines)

This file essentially has a Build target that is just used to kick off two other targets, that are the actual tests.

The first, PropertyIsNotSeenProperly illustrates the problem. The second, PropertyWorks, works just fine.

Notice that the TestValue property starts out false, but in both cases, it does appear to get set to true.

However, at the point that the condition for the DoTheBuildSkips target is evaluated, the value of TestValue must be false, which should be impossible.

I’ve read that the CallTarget is a bit of a deprecated method anyway, so maybe this is all just a problem of old code that hasn’t been properly updated along with the rest of MSBuild.

But, I’ve found that using CallTarget on occasion can simplify some aspects of debugging larger MSBuild scripts, so that’s why I’ve used it. Further, for me anyway, it makes the script a lot easier to read when the steps that it entails are laid out in a list, one CallTarget after another, instead of one target being dependent on another, which depends on another, etc, etc.

Something to be aware of.

UnBatching in MSBuild With Team Foundation Server

0
Filed under MSBuild, VB Feng Shui

I’ve been working on getting MSBuild setup and configured to handle some Continuous Integration builds for our company. One task that came up was needing to get a large batch of files from our TFS server and pull them down to the appropriate directories on a local machine.

But here’s the catch. I didn’t want to just pull everything  from those folders down. Some folders contain very large files that didn’t really need to come down at all, because the intent was that the build process would be building them.

So, it would have been relatively easy to use the MSBuild Extensions pack to get all the files recursively in my project.

    <Target Name="GetInstallFileSet">
        <MSBuild.ExtensionPack.VisualStudio.TfsSource TaskAction="Get" ItemPath="..\InstallFiles" WorkingDirectory="$(MSBuildProjectDirectory)" Recursive ="true" Force ="true" />
    </Target>

The WorkingDirectory parameter indicates where TFS will base all relative file specs from. The ItemPath indicates the folder location (relative to where the MSBuild proj file is located that this Target is in) that TFS should retrieve. The TaskAction of GET just retrieves all files in that folder, and the Recursive parameter tells TFS to get all files in that ItemPath and all it’s subfolders.

Pretty simple, but if there were large files anywhere in the path, TFS will obligingly retrieve them as well, which could suck up a lot of time and bandwidth.

So, first, how to specify only those files that I really want to retrieve? Easy, just use an ItemGroup.

    <Target Name="GetInstallFileSet">
        <ItemGroup>
            <InstallFileSet Include="..\..\Install;
                                     ..\..\Install\System;
                                     ..\..\Install\OtherFiles;
                                     ..\..\Install\DiskSet">
            </InstallFileSet>
        </ItemGroup>
    </Target>

The InstallFileSet ItemGroup will end up with these specific folder names (all relative to the path to the proj file the target is defined in). Unfortunately, I don’t see any straightforward way to “leave out” specific files, because using any wildcard specs when defining this ItemGroup would be based on files that already exist on the local workstation, and hence we run the risk of NOT getting newly added files that exist in TFS but not locally.

But, if those files happen to live in specific subfolders, we CAN leave out those subfolders from the list in the INCLUDE attribute of the Item definition above.

Ah, but what about recursion? In the above case, I specifically DO NOT want to recurse down from the first path in the list (..\..\Install), but I DO want to recurse on all other paths.

That’s where the ‘metadata’ aspect of MSBuild comes into place. Modify the ItemGroup slightly.

    <Target Name="GetInstallFileSet">
        <ItemGroup>
            <InstallFileSet Include="..\..\Install>
                <Recurse>false</Recurse>
            </InstallFileSet>
            <InstallFileSet Include="..\..\Install\System;
                                     ..\..\Install\OtherFiles;
                                     ..\..\Install\DiskSet">
                <Recurse>true</Recurse>
            </InstallFileSet>
        </ItemGroup>
    </Target>

Notice that I’ve split the InstallFileSet item into two pieces, and added the Recurse attribute to each piece.

Now, all the items are still in the single InstallFileSet ItemGroup, but one has a Recurse property of false, the others have it set to true.

Using the ItemGroup

All I have to do now is indicate how to use the ItemGroup that I’ve defined

...
        <MSBuild.ExtensionPack.VisualStudio.TfsSource TaskAction="Get" ItemPath="@(InstallFileSet)" WorkingDirectory="$(MSBuildProjectDirectory)" Recursive ="%(InstallFileSet.Recurse)" Force ="false" All="true" />
    </Target>

Adding this one TaskAction=”Get” line will no perform the Get from TFS on all those Items.

So I ran the build, and… Fail.

TFS gave me a “parsing” error on the ItemName argument. Apparently, it doesn’t like being passed a long list of semicolon delimited path names.

Gah. This is where the UnBatching comes in.

Batching Explained

As a build engine, MSBuild will generally try to “batch” multiple items together into one processing “call”, so that as few invocations of that call as possible are made, under the assumption that fewer invocations will be faster.

Unfortunately, in some cases, you really don’t want the processing batched. In this case, batching would cause multiple paths to be supplied to one invocation of TF.exe (the TFS client app), which, as I mentioned, doesn’t know how to deal with that.

The key to understanding batching is MSBuild will batch by default, but will separate out batches based on two things

  1. Any metadata attributes associated with the batch items
  2. How you reference the items in the batch.

1) is easy. In the above example, I’ve got two values of the metadata tag “Recurse”, so MSBuild by default will execute the GET task twice, once, with the Item(s) with Recurse=true, and once for those with Recurse=false.

But 2) is harder to grok. As it is now, I’m using ItemPath=”@(InstallFileSet)” to reference the itemgroup. That allows MSBuild to batch the items, but then it splits the batch by the Recurse attribute.

However, if I reference the items by the built in identity metadata tag, MSBuild will consider each item in the group has having unique metadata associated with it, so it will execute the GET task once for each item, do that by using %(InstallFileSet.identity) instead, as in:

...
        <MSBuild.ExtensionPack.VisualStudio.TfsSource TaskAction="Get" ItemPath="%(InstallFileSet.identity)" WorkingDirectory="$(MSBuildProjectDirectory)" Recursive ="%(InstallFileSet.Recurse)" Force ="false" All="true" />
    </Target>

If you build now, you’ll notice that the TF.EXE process is launched once for each path in the InstallFileSet ItemGroup, and that the Recurse attribute is applied appropriately depending on which item is being processed.

Conclusion

MSBuild is definitely powerful. In some ways, it’s simpler to deal with than the MAKE/NMAKE systems of old, and the source proj files are definitely more flexible in how they can be used.

But, many of the more advanced functions (that you’ll end up needing quite quickly) can leave you scratching your head. And the available documentation and examples often don’t help much.

The key is patience and experimentation.

.NET Interoperability with COM Office Apps, a Hidden Gotcha

0
Filed under .NET, ActiveX, Office, Troubleshooting, VB Feng Shui

image I’ve been working with .NET and Office interoperability for some time now, and, other than a few minor hiccups here and there, things have generally been very smooth.

But a colleague recently ran into a problem that required a good deal of hunting to resolve. Long story short, even though .NET interoperability with Office objects is virtually foolproof, releasing your references has some hidden dangers lurking amongst the weeds.

As a general rule, it’s safe to let the .NET garbage collector (GC) do it’s thing while your application is running.

BUT, when you’re app shuts down, you need to take a few extra steps to make sure everything’s cleaned up before quitting.

The details are laid on in this article on MSDN. It’s from 2005, but, from what I can tell, it’s just as applicable now as it was then.

Essentially, the trick boils down to this:

When you’re preparing to shut your application down, you need to make SURE you’ve released all your references to any Office objects. This means setting all your various references to Nothing, or, more typically, letting the GC do its thing.

Unfortunately, the GC doesn’t necessarily do its thing during a shutdown, so you have to force the issue. And that requires code essentially like this:

WordApp.Quit() 
WordApp = Nothing 
GC.Collect() 
GC.WaitForPendingFinalizers() 
GC.Collect() 
GC.WaitForPendingFinalizers() 

The article noted above doesn’t really go into why it’s necessary to call Collect and WaitForPendingFinalizers twice, but it does appear to be required. I’m guessing it’s due to the way the Finalizer sweeps object references; it could be possible for it to release objects in a certain order, causing it to skip some objects. But that’s just a guess.

And as a final note, if your .NET code uses any COM interoperability, it might be a good idea to do some final cleanup along these lines as well.

Automating an InstallShield 2009 Build with MSBuild

0
Filed under MSBuild

I’ve been working for some time at automating the InstallShield build process from within an MSBuild script. After a successful attempt using an Exec task along with ISCmdBld.exe, I decided that I really wanted the InstallShield logging included in the MSBuild logging process.

I came across the Microsoft.Sdc tasks project on CodePlex and initially thought it’d work great, but, after a few tries, I discovered it was hardcoded to a very old version of InstallShield.

Then I happened to notice the “InstallShield” folder under the \Program Files\MSBuild folder. In that folder was a 2009 folder and in there were two files:

  • InstallShield.targets
  • InstallShield.Tasks.dll

Surely, this was what I’d been needing all along!

First step, google “InstallShield.Tasks.DLL”.

I ended up here, with a page detailing all the options for the InstallShield MSBuild task. This is for IS 2009, but there are other pages for IS 2008, etc. Looks like most of the parameters are the same though.

Next, hook up the tasks to my MSBuild project file.

<Project ToolsVersion="3.5" xmlns="http://schemas.microsoft.com/developer/msbuild/2003" DefaultTargets="swiNumbering">
   <!-- Define various properties to use during the build here -->
   <PropertyGroup>
      <!-- Test for the InstallShield Extensions -->
      <InstallShieldTasksPath>$(MSBuildExtensionsPath)\InstallShield\2009\InstallShield.targets</InstallShieldTasksPath>
   </PropertyGroup>
  
   <Import Project="$(InstallShieldTasksPath)"/>

This makes the InstallShield task accessible to MSBuild.

Then, just add a target using that task:

      <InstallShield.Tasks.InstallShield
           InstallShieldPath="C:\Program Files\InstallShield\2009 StandaloneBuild\System"
           Project="@(InstallToBuild)"
           ProductConfiguration="Package"
           ReleaseConfiguration="MSI" />

Of course, your values for those parameters will likely be different. The @(InstallToBuild) property points directly to the ISM file you want to build. In my first attempt, I thought I could leave out the InstallShieldPath. Surely the task would look that up from the registry. No dice. You have to have it and it needs to point to your InstallShield System folder or you’ll get an error.

Presto! MSBuild now sees the output of the ISCmdBld process (as evidenced by the nice colored output in the DOS Window when I run MSBuild).

One step closer to complete “Continuous Integration”.

Problems with Microsoft.Sdc.Tasks.Tools.InstallShield

0
Filed under .NET, MSBuild

I’m trying to automate the building of an MSI file using InstallShield’s “Standalone Build Manager” via MSBuild, and one nicety I was hoping to implement was integrating the output of the InstallShield build log into the results of MSBuild.

Originally, I’d used an MSBuild EXEC task to fire up ISCmdBld.exe to perform the build, which works just fine, but which writes the log file to a more or less arbitrary location within the InstallShield project folder structure.

After a bit of Googling, I noticed that the Microsoft.SDC.Tasks MSBuild Extension Library had an InstallShield task as a part of it. Great! Just use that to perform the compilation, and I’m all set!

Unfortunately, that was not quite the case.

Once I’d downloaded the files, extracted them to the proper locations, and modified the Microsoft.Sdc.Common.Tasks file to point to the right place, I was still getting an error when I attempted a build:

Message              = Object reference not set to an instance of an object.

After some investigation, including browsing the source on the codeplex site, I figured out at least part of the problem:

        protected override void InternalExecute()
        {
            #region Execute code

            Directory.CreateDirectory(buildpath);

            RegistryKey installShieldKey = Registry.LocalMachine.OpenSubKey(@"SOFTWARE\InstallShield\Developer\7.0");

The registry subkey referenced in the task points to an InstallShield 7 key, and I’m using IS 2009. <Sigh>

At this point, I’m back to using the EXEC task directly. Not optimal, but it does work.

Controlling MSBuild Verbosity Within the Output Window In Visual Studio

0
Filed under .NET, MSBuild

I’ve build working a lot recently with MSBuild, specifically in relation to automating the build process for our companies products. In my case, our product is mostly .NET, with some VB6 projects still hanging around, and of course some database bits and InstallShield and DemoShield projects to wrap things up for a disc image. Pretty typical commercial product build process.

At any rate, I’ve been experimenting with an MSBuild project type that I could embed in my solution to control all this, not only from the IDE, but also automatically get hooked in with the TFSBuild process, when I really started needing a way to the the diagnostic logging level of the build process when MSBuild is run from within Visual Studio to perform the build.

Normally, VS runs MSBuild with a minimal logging level, so you really don’t see that much in the Visual Studio Output window. I wanted to alter that.

I’d been looking pretty fruitlessly until I came across Sara Ford’s blog here. Turns out, there’s an option in Visual Studio’s Options Window to do just this! It’s not Project specific, unfortunately, so if you set it to diagnostic and then compile a large project, the Output Window will be huge.

But still, nice to know it’s there.

Using Arbitrary Fonts In a Web Page

0
Filed under Fonts, Javascript, Web

image I’ve written here about how to embed arbitrary fonts in a flash file. This approach works, but it has several downsides.

  1. You have to have Flash. It’s not necessarily cheap.
  2. You have to go through a pretty arduous process to embed the fonts.
  3. You end up with a swf file that can be quite large, especially if you have a lot of fonts you need to embed. This can have a very negative impact on your bandwidth and the user’s experience with your site.

I understand that SilverLight has a method for using embedded fonts as well, though I’ve found very little information on it.

But I did recently come across True Font Family.

It’s not a 100% solution, since it essentially replaces specifically styled text on your site with dynamic images of that text in the font of your choosing. But, it’s got some great benefits.

  • It’s cheap, as in 27$, no royaties
  • It’s easy. Just a simple Javascript include, and a little CSS markup.
  • It’s double plus easy. You just upload the fonts you need to use as TTF files to your webserver somewhere. No messing with conversions of any kind. And since the fonts you use can be locked up in a secure spot on your server, there’s no worries of font use violations that might come from allowing end users to actually download the fonts you need for your site.

Plus, they’ve got a newer version coming out sometime in the fall that’ll do all sorts of special effects on the text as it’s rendering it.

Depending on your needs, this might be a very viable alternative to Flash.

Using Embedded Fonts In an External Flash Library

0
Filed under Uncategorized

One project I’m working on now involves showing a “preview” of a user’s selected options in a window on a web page.

The options involve font selection, styles (bold, italic, etc), color, and even mirroring (reversing the text as if it was going on the inside glass of a window).

Most of that would be relatively easy in javascript and CSS, except for the font.

How the heck can you display fonts to a user that doesn’t actually have those fonts installed on their machine?

Well, there’s likely a number of different possibilities, but Flash represents one of the cleaner (if not mind-bogglingly complicated) approaches to the problem.

There are a number of articles on the web concerning embedded fonts in flash, so I’ll try not to rehash that here. But there are a few gotchas that proved very difficult to hunt down, with virtually no mention of them on the web that I could find.

The Setup

First, I’m using Flash CS4 and ActionScript 2.0.

Create two files in Flash. I called one Test2.fla and the other Fonts.fla.

image

The Fonts.fla will be our external Fonts Resource file. Why external? Why a separate file? Well, technically, once you’ve gotten your fonts together, it’d be nice to not have to continue to have them installed on your machine. Separating the fonts from the flash files that will use them allows you to build the font resource SWF file once, remove all those fonts, and then still be able to work on your actual Flash file (the one with your actual movie/code in it).

Note the properties for my actual movie fla file:

image

Its basically the same settings for the Fonts.fla file, although, technically you could set it as ActionScript 3.0, I suppose. There’s no script necessary for the Fonts.fla file.

Setting Up The Fonts.FLA file

Switch to the Fonts.FLA file and show the Library. Press Ctrl-L to show it if it’s not already showing.

Then, Right Click in the empty space and choose New Font:

image

You’ll get the Font Symbol editor window. This is where the magic happens (or doesn’t, if you get it wrong).

image

There’s a lot going on here, so, starting at the top.

  1. The NAME field must NOT be left as just the name of the font, no matter how tempting that may be. I suffixed the normal version of every font I embedded with “Normal”, but it doesn’t really matter. Just make sure it’s NOT the actual name of the font.
  2. The Font field just allows you to pick the font. This means the font you want to embed MUST be actually installed on the machine. A pain, but that’s what ya gotta do.
  3. The Style box will only be enabled when the font you’ve chosen actually has a specific style (Bold, Italic or Bold Italic) defined within the font itself. Most fonts don’t, so this box will likely be disabled. If it IS enabled, choose whichever style you need to embed.
  4. The Faux Bold and Faux Italic checkboxes are enabled when the font doesn’t already define a Bold or Italic style. if you want bold or italic, check the appropriate box. HUGE NOTE: These boxes are ANDed, which means if you check both, you get a faux BOLD/ITALIC font. You do NOT get a bold version of the font and an italic version. This is very important and I’ll get to why in a bit.
  5. You’ll need to check the “Export for ActionScript”, and when you do so, the Identifier field will enable (for ActionScript 2.0 at any rate). Be sure that the name entered here IS NOT the actual font name. It needs to be something different. I usually make it the same as the NAME field above.
  6. And finally, check the Export for Runtime sharing. Since this is going to be an external font resource swf file, we need to export the font so other SWF files can reference it.

I didn’t mention the SIZE file. I’ve put 30 there, but, from what I can tell, you should be able to put just about anything you want. The process of embedding the fonts actually converts the glyph vector outlines into a Flash friendly format, but they’re still vectors, so they can essentially be scaled to any size.

That said, often at small sizes there are hints embedded in the font for particular sizes that might not make it into the embedded font vectors. I’m no font expert though, so I can’t be sure of this.

Fonts, Fonts

What if you need more than one font? What if you need the Bold version of a font? What if, heaven forbid, you need the normal, bold, italic and bold italic versions of the font?

First off, even though it may alarm the Flash purists out there, there are occasions when such things are necessary. The downside, however, is that your fonts.swf file could get rather large quickly. The reason is that you’re actually embedding all the font glyphs into the file. But it’s worse than that.

Flash, treats every style of a font as a completely separate font. So, if you want normal and bold, well, that’s two fonts. Normal, Bold and Italic? That’s three complete sets of glyphs. Normal, bold, italic and bold italic? That’s 4 complete sets of glyphs for that font.

Needless to say, the swf file can get large fast. Something to be aware of at any rate.

So, let’s say you want to include the BOLD version of Tahoma.

image

Just repeat the above steps, but with Tahoma, the STYLE combobox is enabled (Tahoma has the Bold style predefined). Drop down the Style Combo and select Bold. Then, make sure the Name and Identifier fields are set to SOMETHING OTHER THAN “Tahoma”. I just used “TahomaBold” to keep things simple.

Now, repeat those steps for EVERY FONT and EVERY STYLE of font you want to embed. What’s worse, I looked for quite some time for any way to automate this process and failed. The only way to do it that I could find was completely manually. Yuck!

In the end though, you should have a library pane that looks like this (I’ve dragged all the fonts into the Fonts folder, but you don’t have to).

image

Again, the KEY TO THIS is that NONE of the font NAME fields or the IDENTIFIER fields can be the same as the actual font.

Flash is smart enough that when you ask for “Tahoma” with a style of Bold, it’ll match things up properly. But if any font is actually named “Tahoma” (i.e. in either of those two fields), Flash will only ever choose that particular named font/style, regardless of what you might ask for. Peculiar, yes, but that’s what it appears to be doing.