Category Archives: Utilities

XPath Testing Tool (XPathMania)

0
Filed under Utilities, VB Feng Shui, XML

I mentioned RAD Software’s RegularExpression Designer a few posts back, but this time, I’m talking XPath.

If you haven’t already played with XPath, and you do much of anything at all with XML data, you owe it to yourself to check it out. Basically, it’s a query language that allows you to query for specific nodes or nodesets from an XML data source very easily. It’s also got some limited function and expression handling capabilities (typical math functions, string manipulation functions, etc).

XPath 1.0 is fully supported by the .net framework. Unfortunately, XPath 2.0, while much more capable, has been dropped by Microsoft in favor of, I believe, XQuery. Trouble is, I can’t find much in the way of VB.net support for XQuery right off.

But, all that aside, XPath 1.0 is still very much a useful tool to have in your arsenal, but, like regular expressions, getting an XPath query right can take some experimenting. That’s where XPathMania comes in.

It’s basically an XPath query tool extension to the VS 2008 IDE.

In the screenshot below, you can see that I’ve got an XML file loaded, and I’ve docked the XPathMania window just below it.

With that, I can easily enter a query again that XML file and view the results (along with the matching nodes actually highlighted in the XML file view! Good stuff!

image

Finally, you’ll also definitely want to check out this page for lots of good XPath example queries.

In the future, I’ll try to put together a little sample app that illustrates how to use the XPathNavigator to easily execute these queries against an XML document and enumerate the resulting nodeset.

FreeCommander Ain’t Half Bad

2
Filed under Utilities

The other day, I was needing to quickly view lots of log files in a folder. The Ol’ “Double click/open in notepad/close notepad/arrow down/repeat” process was getting old quick.

Now, at home, I’ve got Directory Opus, which would make this a breeze. But, it’s a licensed copy, and unfortunately, their licensing is a tad draconian. Besides, I was at an office, so I didn’t have my sernum or anything like that handy.

So, I started poking around. I’d looked at a pile of Explorer replacements awhile back. That’s how I ended up buying DirOpus. But this time, I needed something free I could download, install and get my job done.

A few minutes of googling pointed my to FreeCommander. I can’t say I even looked at this package before, because it’s billed as a “Norton Commander Clone”, and I never really got into Norton Commander.

image

That picture viewer you see on the right? It’ll view just about any file type, which was just what I was needing.

But come to find out, FreeCommander is much more than just a Norton Commander clone.

There’s lots of very cool features here, including:

  • Tabbed explorers
  • A decent Tree (it doesn’t show the full tree like explorer does, but it comes close enough to be useful)
  • A decent file viewer that can be “in place”, meaning it doesn’t open a new window to show the file being viewed.
  • A “Quick Filter” which is very handy.
  • Predefined Filters, for when the quick filter isn’t quite enough.
  • Lots of config options
  • Reasonably fast, even in dirs with lots of files.

And finally, so far, it’s been very stable.

In all, a very compelling Explorer replacement, especially considering the price!

A One Line CSV Parser

4
Filed under Code Garage, Regular Expressions, Utilities, VB Feng Shui

Parsing up Quote Comma delimited text is a pretty common thing to do, and it seems trivial enough till you realize all the little gotcha’s that come with the problem (like doubled quotes, commas in quotes, etc, etc). Then it becomes just another laborious exercise in boring coding.

I came across a regex some time ago that makes the process literally one line of code. I can no longer find the original author but the code I found (what little there was of it) was C# and actually split up into a few lines of code, so this is converted to the equivalent VB.net:

    Public Function QCSplit(ByVal Args As String) As String()

        Return (New System.Text.RegularExpressions.Regex(",(?=(?:[^""]*""[^""]*"")*(?![^""]*""))")).Split(args)
    End Function

The regex used here doesn’t actually match on the contents, it matches on the commas that split things up, and it then uses the SPLIT function to actually split those things up.

I’ve used this a while now and it works great, but I’ve seen a few interesting alternatives since.

The most interesting thus far is this one by Daniel Einspanjer. Not interesting enough yet for me to switch to it, but the regexlib.com website is quite nice as a great repository of good regex recipes.

Regular Expression Tester

And speaking of Regular Expressions, the guys over at RAD Software, have a free Regular expression tester for .net style regular expressions that works fantastically. If you’re just starting out in regex’s (and seriously, who isn’t <G>), you owe it to yourself to pick up a decent regex test tool, and this one is as good as I’ve seen so far.

image

As far as I can tell, it can handle all the various options for regex’s, and dynamically shows match results, etc. Very handy for trying out expressions without actually running them in .net.

Add it to your External Tools menu in VS and it’ll be right there, good to go.

Merging Assemblies, the Easy Way (part 1)

0
Filed under Code Garage, Utilities, VB Feng Shui

image Recently, I ran into a need to make use of the Mono.Cecil.dll library from a .net application I was working on. Cecil is a fantastic little project under the Mono project that allows you to interrogate an existing .net assembly (EXE or DLL file) and retrieve all kinds of information about the assembly, from the resources embedded within it to the classes and methods defined, and much more. You can even alter the contents of the assembly and write the new version back out to disk!

The thing is, Cecil comes prebuilt as a C# assembly (a DLL file), and I really did not want to have a second file required for this particular application (it’s just a little command line utility).

My first take was to use Oren Eini’s excellent concept of an assembly locator. My idea here was to embed an assembly as a binary resource, then, when requested, read that resource into a stream, load the assembly from the stream, and resolve references to it via the assembly locator.

I’m still working on that concept, because I think it’s a clever and convenient solution to the problem, but, in researching that, I happened to remember the even easier (as in, no code required at all!) solution of using ILMerge.

ILMerge

If you haven’t already discovered it, ILMerge is a Microsoft research project in the form of a single command line EXE utility, that can “merge” any number of .net assemblies with a “target” assembly, and produce either a .net DLL or EXE output file.

There’s a really good article on CodeProject describing the general use of the program. There’s even a GUI (Gilma) for it.

Automating ILMerge

What the article doesn’t go into is automating the ILMerge process. After all, you won’t want to manually run that command line utility every time you build your application!

The good thing is, it’s trivially easy to automate as long as you take care of one critical step.

  • First, download and install ILMerge from the link above.
  • Once it’s installed be sure to copy the ILMerge.exe utility to somewhere on your path (or add the folder it’s in to your path).
  • Then, grab the Mono.Cecil.dll file (or whatever DLL it is you want to merge into your main project EXE). Put it in the root folder of your project.
  • Go ahead and set a reference to that file, so you still get all the .net intellisense goodness, but be sure to set the Copy Local property for the reference to FALSE (after all, you don’t want to copy this DLL to the output folder along with the application if you don’t actually need it, right?)

    image

  • With that done, you MAY want to mark the DLL you’re embedding as “included in project” from the Solution Explorer.

image If you do this, however, make sure you also set the Copy to Output Folder to “Do not copy” (that’s the default though so it should already be set).

The Tricky Part

One limitation of ILMerge is it that it can’t alter the target assembly “in place”. This means that, for instance, if you want the final resulting executable file name to be called GenerateLineMap (my utility), you can’t have VS compile the assembly to that name. You’ll need to use some other name for the initially compiled assembly.

On the Application tab of the project properties you can change that name, like so:

image

I just added “-Interim” to the Assembly Name.

Now, go to the compile tab of the project properties and click Build Events

image

Insert this as the POST BUILD EVENT

ilmerge /target:winexe /out:”$(TargetDir)$(ProjectName)$(TargetExt)” “$(TargetPath)” “$(ProjectDir)Mono.Cecil.dll”

Notice that the OUT parameter specifies the output file name via the $(ProjectName) variable (which is still “GenerateLineMap”) while the first assembly to merge is specified using the $(TargetPath) variable (which is the full filename of the output assembly, including the “-Interim”).

image

EDIT: Important note: Notice the /target:winexe option. You’ll need to change that as appropriate depending on the type of exe you’re building. In my case, I had a console app where this needed to be set to just /target:exe. Setting it to /target:winexe caused all of the console output functions to just do nothing, which threw me for a bit!

Now, just rebuild the solution and you should see two resulting EXE files in your output folder, one with the “–Interim” (which is the version WITHOUT the embedded Mono.Cecil.DLL file or whatever DLL you’ve chosen) and one WITH the embedded file. As a final cleanup, you may want to add an additional Post build step to remove the “*-Interim” files.

To test, just make sure you DO NOT have the embedded DLL anywhere on the path or in the same folder as the exe and run the exe. If everything went right, your app should work exactly the same as if the embedded DLL was included externally with the app!

Now, your application is back to being a single EXE to distribute, and it was built completely automatically by Visual Studio.

Caveats

You knew there had to be some, right?

The first is that if the dll to embed contains licensing information, it might not work properly after being embedded. I don’t have any DLLs like that to test with, but I’ve read reports about the problem at various sites on the internet. Just something to be aware of.

Second, trying to replace the originally named exe with the newly built one results in VS not being able to debug the exe in the IDE (it throws a message about the assembly manifest being different from what was expected). I haven’t worked that issue out yet. What this means is that you might need to leave any references set to “Copy to Output Folder” while debugging, and not replace the original compiled assembly, just ILMerge it into a new assembly name.

That Annoying “The publisher could not be verified” Prompt In Windows 7

4
Filed under Tweaks, Utilities, Vista, Windows 7

I’ve just finished paving my main machine with Windows 7 64 bit, and was working on tidying up some of the finer points of my installation.

One minor item I use is a batch file with a reference to the excellent Poweroff utility. The batch file basically powers down the monitor, locks the machine, then goes into standby/hibernate mode. I attach it to a Ctrl-f11 hotkey to make it a quick keystroke to powerdown my machine.

Anyway, I have that bat on my path, and I happen to keep it out on a network drive (a NAS array), not on my local machine. I generally keep data off my local machine, preferring to only have program installs and temp files locally.

But when I pointed my shortcut to the network path and hit Ctrl-F11, I’d get that annoying “The publisher could not be verified” prompt. Every time!

Well, a few googles later and I came across this tip on annoyances.com.

It’s for Vista, but it also works in Win 7 (even the 64bit version).

Run gpedit.msc Go to User Configuration >> Administrative Templates >> Windows Components >> Attachment Manager Add "*.exe; *.bat" to the "Inclusion list for moderate risk file types" setting.

I added *.bat to the list, as well as *.exe because, in my case, I keep a number of handy BAT files in folders out on my network drives and then include those folders in my path.

Works a treat. Be sure to read up on why to include this in the Moderate risk element and not the High Risk, though. Generally, if you have a reasonably good firewall/router, making this change should be safe.

Alternatives to Connecting to Cisco 3000 VPN

1
Filed under Utilities

image The Cisco VPN client has issues, let’s face it.

I’ve blogged about Cisco before (and here). When it works, it works just fine.

The problem is, quite often, it doesn’t work. And it’s really compounded if you’re using any app that creates and destroys network interfaces (VMWare is one such app, but there are many others). What happens, from what I’ve discerned online, is that the Cisco VPN Client doesn’t deal with network interfaces moving around and being changed. So it just fails to connect. And once it’s failed, it’s virtually impossible to get it to connect again without a reboot.

And, at least for me, anyway, often, rebooting once isn’t enough. It’ll take two reboots before the Cisco client is happy again. Now, all this is using the Cisco 3000 VPN appliance, which is believe isn’t exactly the newest VPN solution on the block. Maybe there are newer ones out, but that’s the one that the company I’m with is using.

So… I’ve been hobbling along like this for months. I’d tried the VPNC client some time ago but could never get it to connect. VPNCFE is better, usability wise, but I couldn’t get it to connect either.

I decided yesterday to take another look at the problem, and I stumbled across the Shrew Soft VPN client. image

At first, I downloaded the latest “stable” release. But, since it didn’t import the Cisco *.pcf file (the configuration file for a particular connection), I couldn’t figure out which parts of the Cisco config to put where in the Shrew Soft config screens, so I never got it to work.

I’d almost given up when I came across a post that mentioned being able to import PCF files was added in the latest RC build.

Sure enough, back to the Shrew Soft download page and there’s a 2.1.5 RC2 download link. An uninstall and reinstall later, and I could successfully import my Cisco PCF file.

And the connection worked instantly!

So far, no problems at all. Everything works just as well as it did with the Cisco client (that is, when the Cisco Client would connect!).

The other benefit to the Shrew Soft client is that it works under 64 bit OS’s (including the upcoming Windows 7, from what I can tell). That’s something Cisco still isn’t supporting.

And best of all, it’s free!

Using TLBIMP.exe to create Strong Named Interop Assemblies

6
Filed under .NET, Utilities

Working on a VSTO 8 Word addin recently, I discovered to in order to deploy it, you must “strong name” the assembly.

I’d already obtained a Verisign certificate for digital code signing, and had a password protected PFX file containing both my public and private keys, so I figured I had what I needed.

So, I loaded the project, set the signing options to use my PFX file and compiled.

Full stop.

“Interop.Word.dll” is not strong named

Doh.

A little research later and it turns out that if you strong name one assembly, every single assembly that it references must also be strong named!

Yikes. In my case, I have almost a dozen, plus piles of interop assemblies for accessing legacy COM libraries.

First, the .NET assemblies. Setting them to be strong named using the same PFX file is easy, just use VS, under the project properties.

image

But, if your .net code refers to any COM components, it’s very likely you also have references to “interop” assemblies. These are DLLs that VS creates for you “behind the scenes” to act as convenient .net wrappers around the COM library objects.

The problem is that VS won’t automatically strong name those interop assemblies, and if you strong name your .net assembly, those interop assemblies also must be strong named.

First, I tried just creating an interop assembly.

I chose the Word 2000 object library to initially play with, but just about any COM dll or TLB or OLB file will do.

tlbimp "{path}\msword9.olb" /verbose /out:Interop.Word2000.dll /sysarray

(note, {path} is the path to your copy of this file, and the /sysarray option appears to be required if your working with just about any COM based interface). Worked like a champ.

So, I add in the keyfilename argument:

tlbimp "{path}\msword9.olb" /verbose /keyfilename:mycert.pfx /out:Interop.Word2000.dll /sysarray

and TLBIMP responds with an “Incorrect strong name arguments specified” error.

I then tried the PUBLICKEY option, like so:

tlbimp "{path}\msword9.olb" /verbose /keyfilename:mycert.pfx /out:Interop.Word2000.dll /sysarray

This appeared to work, until I actually tried to run my application. It failed, indicating that the “Strong Named Assembly was corrupt or was not signed with a private key”. Apparently, PUBLICKEY means just that, that the public key is used for one part of the signing process, and that you have to use a private key for the other.

I really didn’t want this to be a two step process so I kept looking.

Eventually, I discovered that signing an assembly is a completely separate process from “Strong Naming” an assembly.

Strong Naming an assembly doesn’t guarantee that you wrote it, but it does provide a way for one assembly to guarantee that it is loading the exact same assembly that it was compiled to work with, a subtle but significant difference.

Signing an assembly, on the other hand, requires a certificate from a signing authority, like Verisign. Signing does guarantee that an assembly was written by who the certificate says it was written by.

From what I can tell with VS2008, signing an assembly automatically strong names it, but the reverse is not true.

And certain assemblies need to be signed, (such as the primary assembly for an Office Addin), but others don’t.

And still others need to be strong named, but don’t necessarily need to be signed (such as any assembly or interop assembly referenced by an Office Addin.

But when you do this, you might notice that you end up with another unexplained dll in your output folder, called Office.dll.

After some digging, it turns out that TLBIMP will also create interop files for those COM libraries referenced by the COM library that you’re creating an interop file from. And you’ll need to include those additional interop files with your app for everything to load properly.

This is where the /reference option comes in. First, generate a strong named interop file for the referenced COM library, and then for the COM library you actually care about, like so:

tlbimp "{path}mso9.dll" /out:Interop.Office2000.dll /sysarray /verbose /keyfilename:mycert.snk 
tlbimp "{path}msword9.olb" /out:Interop.Word2000.dll /sysarray /verbose /keyfilename:mycert.snk /reference:Interop.Office2000.dll

The first line will create the Interop file for the Office.dll, which is referenced by Word.

The second line will create the interop file for Word itself, but note that it uses the /reference option to indicate that this interop file should reference the just created interop file for the Office library.

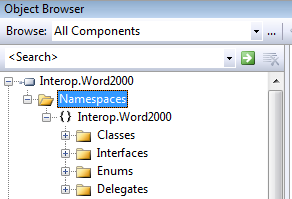
Finally, a note about namespaces. You’ll notice that I specified an OUT filename of Interop.Word2000.dll.

TLBIMP appears to automatically assume that when you do that, you want the classes defined within that interop file to exist within the “Interop.Word2000” namespace (ie the file name minus the “.dll”).

image

This may be appropriate, but it may not be, depending on your needs. Why might you want to change it? The only reason I can think of offhand is that you are referencing multiple versions of a single COM interface. A common example would be the need to reference both the Office 2007 Primary Interop files (available directly from Microsoft), and the Office 2000 interop files you created yourself (because MS doesn’t provide them).

It is possible that the two Interop files would have the same namespace and would collide.

Changing the namespace of one of them will allow your assembly to reference both interop files with no collisions. This is one element of .net that is, at the same time, unfortunately complicated, but incredibly useful.

Fixing Fonts that Won’t Install

1
Filed under Fonts, Utilities

image Previously, I wrote a bit about fonts that won’t install under Vista (and possibly Windows XP SP2, but I haven’t tested that).

Apparently, Vista expects certain fields within the TTF file to be filled, whereas older versions of Windows don’t. The result is that while you might have been able to install a particular TTF file perfectly fine under an older version of Windows, the same font won’t install under Vista, with Vista claiming the font is corrupted.

Enter Font Creator Pro 5.6, a utility to actually allow you to edit fonts. One of its ancillary features, however, is the ability to correct this problem in TTF files quite easily.

Unfortunately, it’s a very manual process, requiring a lot of mousing or keyboarding.

Until now!

I cobbled up a short little VBScript that will accept either dragging and dropping onto it, either:

  • a single TTF file
  • Several TTF files
  • or a single folder containing a bunch of TTF files

The script essentially automates the process of loading the font into Font Creator, applying the rename fix and saving the font out.

Note that it saves the font in place (for simplicity’s sake more than anything else), which means that you should make a backup of any font you process with this.

'FONT FIX SCRIPT
'Darin Higgins May 2009
'---------------------------------------------
'Requirements
'------------
'Eval or licensed copy of Font Creator 5.6
'
'Purpose
'-------
'Many Fonts will not install properly under Windows XP SP2 or Vista, because they are 
'missing a few values for several internal fields.
'While the field values themselves are immaterial, Windows will consider the font "corrupt"
'
'What this script does
'------------
'You can drag either a single TTF font file or a folder that contains a number of TTF files
'onto this script.
'The script will run and will use Font Creator to
'1) Open the font
'2) Perform a Font Creator "AutoName" on the font
'3) Close and save the font, overwriting the original file.
'
'I've never had problems but if you are concerned, be sure to make a backup copy of
'all your font files first.
'
'Usage
'-----
'1) Make sure that you've opened Font Creator, clicked past the eval screen
'   and have an empty window open before running this script
'2) Drag iether a single TTF file or a folder containing TTF files onto this script
'3) The script should run, with lots of window flashing.
'4) Don't touch anything, even if you hear beeps.
'5) Eventually the script will finish. It is possible that some files didn't get saved properly
'   so check each file with a good font viewer app.
'
'--------------------------------------------------

dim Name
Dim fso, fldr, s, file
dim shell
Dim Count, x
dim excel

Set shell = CreateObject("WScript.Shell")
Set fso = CreateObject("Scripting.FileSystemObject")
set Excel = nothing

for x = 0 to wscript.arguments.count-1
    Name = wscript.arguments(x)
    on error resume next
    '---- first, try to retrieve argument as a file
    if fso.FileExists(name) then
        '---- it worked, convert the single file
        Count = Count + 1
        CheckForQuit
        FixTheFont name
        CheckForQuit

    elseif fso.FolderExists(name) then
        '---- try to get a folder
        on error resume next
        Set fldr = fso.GetFolder(Name)    
        For each file in fldr.files
            if instr(1,ucase(File.Name),".TTF") <> 0 then
                Count = Count + 1
                CheckForQuit
                FixTheFont File.Path
                CheckForQuit
            end if
        next
    end if
next

'---- don't show a message if Only one file was processed
if Count > 1 then Msgbox "All Done"

'---- Alert if nothing was processed
if Count = 0 then Msgbox "No fonts were processed"

CleanUp

'====================================================
'End of main script
'====================================================

Sub CleanUp()
    if not Excel is nothing then excel.quit
    wscript.quit(1)
End Sub


'---- this subroutine uses sendkeys to 
'1) load the font in FontCreator 
'2) tell FC to perform the AUTONAME function on the loaded font
'3) close and save the font
Sub FixTheFont(File)
    shell.appactivate "FontCreator 5.6 (UNREGISTERED)"

    wscript.sleep 1000
    shell.sendkeys "%F{DOWN}{RIGHT}{DOWN}{ENTER}" 
    wscript.sleep 500

    '---- fix up possible bad elements in the Filename (could conflict with SendKeys)
    File = Replace(File, "{", chr(1) & "1")
    File = Replace(File, "}", chr(1) & "2")
    File = Replace(File, "(", chr(1) & "3")
    File = Replace(File, ")", chr(1) & "4")
    File = Replace(File, "[", chr(1) & "5")
    File = Replace(File, "]", chr(1) & "6")
    File = Replace(File, "+", chr(1) & "7")
    File = Replace(File, "~", chr(1) & "8")
    File = Replace(File, "%", chr(1) & "9")
    File = Replace(File, "^", chr(1) & "A")

    File = Replace(File, chr(1) & "1", "{{}")
    File = Replace(File, chr(1) & "2", "{}}")
    File = Replace(File, chr(1) & "3", "{(}")
    File = Replace(File, chr(1) & "4", "{)}")
    File = Replace(File, chr(1) & "5", "{[}")
    File = Replace(File, chr(1) & "6", "{]}")
    File = Replace(File, chr(1) & "7", "{+}")
    File = Replace(File, chr(1) & "8", "{~}")
    File = Replace(File, chr(1) & "9", "{%}")
    File = Replace(File, chr(1) & "A", "{^}")

    shell.sendkeys file & "{ENTER}"
    wscript.sleep 500

    Shell.SendKeys "%LN"
    wscript.sleep 500
    shell.sendkeys "{ENTER}{ENTER}"
    wscript.sleep 500
    shell.sendkeys "%FC{ENTER}"
    wscript.sleep 1500
end sub


'------------------------------------
'Check to see if user pressed esc
'Do this using a hadny little hack through excel
'There's likely better ways, but this works
'------------------------------------
dim Skip
Sub CheckForQuit
    if Skip = true then exit sub

    On Error Resume Next
    '---- make sure Excel exists and we can create an object
        '     if not, no big deal, just skip all this code
    if excel is nothing then
         set excel = CreateObject("Excel.Application")
                if err then Skip = true
        end if

    if Skip = true then exit sub

    dim keys(0)
    'ESCAPE
    keys(0) = 27

    dim Passed
    Passed = 1
    For i = 0 To UBound(keys)
        keystate = excel.ExecuteExcel4Macro("CALL(""user32"",""GetAsyncKeyState"",""JJ""," & keys(i) & ")")
        If (keystate and 1) = 0 Then
            Passed = 0
        End If
    Next

    If Passed = 1 Then
        CleanUp
    End If
End Sub

To use it, just copy the text above and save it to a FixFont.VBS file on your desktop.

Then, back up a font TTF file you want to process, and simply drag it from Explorer onto the VBS script.

Then sit back and let it drive for a few seconds.

Each font takes about 2-3 second to fix.

It doesn’t work 100% (sometimes the SENDKEYS just don’t get synchronized properly), but I didn’t have any problems as a result, and I processed some 10,000 fonts through it. It just took several passes (and a few days<g>)

One final note. I used a trick from Excel to check if the ESCAPE key has been pressed and terminate the script. If you have Excel, that should work fine. If not, it should just skip all that, but that means you won’t be able to stop the script should you need to. To be safe, just do a few fonts at a time.

And as with everything else here, IWOMM (It Works On My Machine) but your mileage may vary.

Don’t Forget About the Task Scheduler

0
Filed under Utilities

A little known facet of Windows that’s been there since the early days of NT is the Task Scheduler (I seem to recall actually using the AT scheduler it under NT4, but my memory is sketchy back that far<g>).

image

It’s part of the Control Panel, and it essentially lets you schedule applications, scripts, etc to be run automatically, using a particular set of login credentials, at particular times.

Many applications out there can be run as Services, which means they run all the time, in the background, even before anyone has logged into the system.

But for many types of applications, running as a service isn’t necessary and just takes up memory and processor time from other applications that do need to run all the time.

I happen to use a backup utility called FileBack PC. They have a service module that allows it to run as a service, complete with scheduling etc. But they charge extra for that module.

I was really wanting to schedule my backups to run late at night, and I really wanted them to happen regardless of whether I’d logged into my server or not.

That’s when I remembered the Task Scheduler. Here’s an example screen of a configuration to run a backup job called “NearLine Backups” every morning at 7:00am.

image

In order to setup a scheduled task, you double click on “Add Scheduled Task” and walk through the wizard that follows:

First, the introductions screen:

image

Next, select the application you want to run, in my case, it’ll be FileBack.exe.

image

Choose to run it daily:

image

Set the time:

image

And finally, set the user name and password for the account that this task will be run as:

image

It’s quite important to get the account and password right, since the task that is run will run with those credentials. Also, if the task needs access to certain network resources or drives, that account will have to have access to those resources.

Once you have these bits set, you can always dblclick on the task from the Scheduled Tasks list and edit various details, such as additional command line parameters for the executable being run, etc. In my case, I had to add the name of the backup job I wanted to run, like so:

c:\program files\FileBack PC\FileBack.exe “NearLine Backups”

But every application will be different.

And that’s it.

If you are logged in as the user that the task will run as, and the task is scheduled to run, you’re likely to actually see it start and run.

If no one is logged in, or if you’re logged in as another user, you won’t see anything happening.

As always, you’ll want to test and verify that what you think should be happening actually is. But, using the Task Scheduler is certainly something to keep stashed in the toolkit!

A Better Email Notifier

1
Filed under Utilities

Well, it happened.

I didn’t think there was any better Email notifier out there than ePrompter. It’s been a stable staple on my desktop for what seems like eons.

But I just recently discovered PopPeeper:

image

It’s free (they do ask for donations though, and that’s cool), it works with just about any Web/Pop3/Imap email service you can think of (I’ve even got it connecting to an old GroupWise server!), it’s very customizable (you can even skin the thing), shows any number of accounts, has a rotating tray icon that indicates how many messages are new (just like one of my favorite features of EPrompter), and can read HTML and RTF emails much better than EPrompter (and you can still tell it to not grab images/attachments if you want).

If you grab it, be sure to also grab their PopTweaker. It’s an addon dll that lets you configure a whole lot more settings than the default. Not sure why they decided to make that a separate DLL, but it works.