You might think such a thing would be insane to attempt. And why bother?
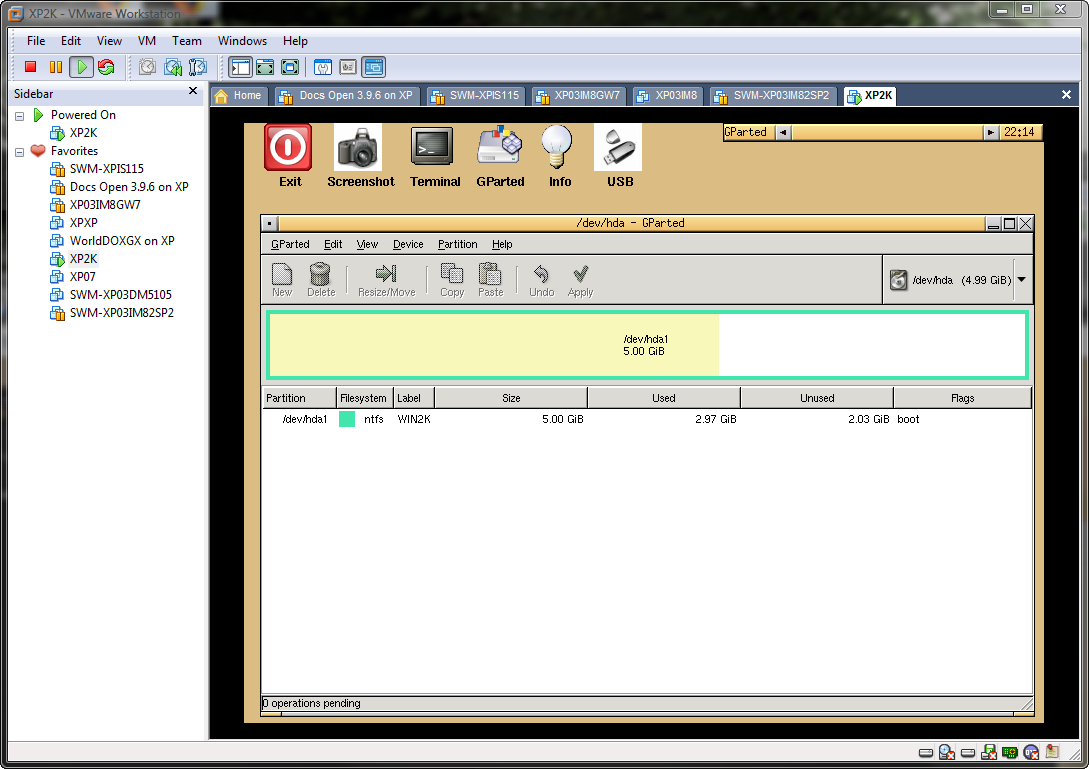
Here’s a shot of GParted (a Linux based partition editor) booted from a USB stick (in the host machine). It’s quite handy in that it seems to work about as well as Partition Magic. It’ll copy partitions as well.

The main reason for all this is that it’s awfully handy to test USB bootable key configurations from a VM instead of having to constantly reboot a real machine. And why a bootable USB configuration? Well, if you’re in IT, you often find yourself sitting at a machine that won’t boot or that needs to low level lovin’ to get it back on track. And things like GParted, Partition Magic, Partition Commander, or SysInternal’s NTFSDOS, not to mention SPintrite can be awfully handy to have swinging from a gold chain around your neck.
One caveat to this. Make SURE you DON’T access the USB key from your host machine while you do this. Doing so will likely trash the formatting on the key. You have been warned, young jedi.
Ok. Here we go…
Make sure you’ve inserted the USB Key and Windows “sees” it (doncha love that bong sound).
Start VMware (it will see the USB if it’s inserted, but it might not see it if you insert the USB key AFTER you’ve started VMWare).
Make sure the virtual machine in VMware is turned off.

Click on the virtual machine settings and click Add:

Choose “Hard Disk” from the device type list, then “Use a Physical Disk”, since we’ll be booting to the USB Key.
Here’s the important part. You should get a window like this:

See that drop down list with the PhysicalDrive0 in it? If you drop it down, you should see at least one other drive (Physical Drive 0 is typically the C: drive in your host machine, you DON’T want to use that drive!). In mine, it was PhysicalDrive5. Select which ever one is your USB Key drive.
And select “Use Entire Disk” (unless you’ve partitioned your USB Key drive).
Finally, give it a filename for the vmdk file (that’s a little config file that VMWare uses to keep track of what physical drive is mapped to what virtual drive).
Fire up the VM, and be quick about pressing F2. That’s how you get into the VMware bios for the vm.

It might take a few tries to get it, but eventually, you should get to the BIOS screen. Move over to BOOT and press Enter to expand the hard drive options:

On my system, that “VMware Virtual Scsi Hard Drive (0:0) entry was listed 3’rd. Use the “+” key to move it up to the top of the boot priority list.
Then save your changes.
If you did everything right, when you reboot the VM, you should boot to your USB drive.
How did I get GParted to actually be able to boot from a memory stick?
I’ve blogged about getting USB memory stick drives bootable here, and here.
But for GParted, there’s a little more wizardry at work. You’ll need to use fat32format to format the drive, then use SYSLINUX to make it linux bootable, then copy the GParted ISO contents to the stick. See the above links for details.
Finally, you’ll need to move a few files.
The root of the GParted image look like this:

Nav into the syslinux folder and move all the files there, down to the root of the drive.
Then nav to the boot folder, and move the gparted and gparted.igz files down to the root of the drive.
That should do it. Fire up a VM and give it the boot.
So what have you done with your USB key today? (absconding with company secrets doesn’t count, shame on you!)


